In this article:
The best way for a new mother to establish a nurturing bond with her baby is through breastfeeding. But sooner or later, you will have to switch to other alternatives for feeding your baby.
Nursing becomes quite inconvenient when you are running low on breast milk, are in the throes of illness, or are nearing the end of your maternity leave and have to shuffle between work and home.
Your baby’s need to be breastfed can gradually be phased out by switching to a bottle, which is the natural progression that most new parents adopt. Perhaps the greatest comfort associated with bottle feeding is that it can be done by anybody at home, not just the mother. The most prominent con, however, is the effort that goes into cleaning and sterilizing the bottle.
After remaining cocooned in the warm confines of the womb, infants take their own sweet time to adapt and adjust to the foreign environment of the outer world. Moreover, their immune system is still very nascent and underprepared to take on even the everyday germs and bacteria that are usually harmless to adults.
Thus, cleanliness with regard to everything your baby comes in contact with cannot be stressed enough. One key aspect of maintaining such sanitary standards is to keep your baby’s feeding equipment both clean and sterilized.
The mouth is the primary entry point to the body, so it is imperative that you take extra care of what your child is putting in his/her mouth. Sterilization goes a long way in eliminating any trace of microbes from your baby’s feeding bottles and cleaning them thoroughly.
Pre-Sterilization Ritual: Cleaning Bottle-Feeding Equipment
You can avoid the need to sterilize your baby’s bottle-feeding equipment frequently by cleaning it after every feed. Besides, cleaning the bottles, teats, and other feeding equipment in hot, soapy water is also an essential prerequisite of the sterilization process.
Here is a step-by-step guide for successfully completing the pre-sterilization regimen: (1)
- First and foremost, wash your hands with soapy water and dry them with a clean towel. If you detect any cracks in the bottle’s teat, discard it at once as bacteria can easily flourish in the tears.
- Cleaning bottles, teats, and other feeding equipment often involve using a bottle brush that can reach the narrow insides of the bottle and teat to scrub out any dried milk stuck on the surface. To clean the small opening in the teat, squirt water through it.
- Turn the teat inside out and wash it in hot soapy water for a more thorough cleaning. It is preferable to scrub the teats separately by hand, rather than in a dishwasher.
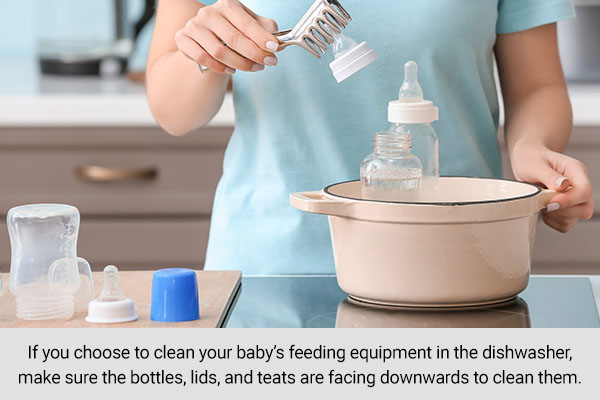
- If you choose to clean your baby’s feeding equipment in the dishwasher, make sure the bottles, lids, and teats are facing downward to clean them.
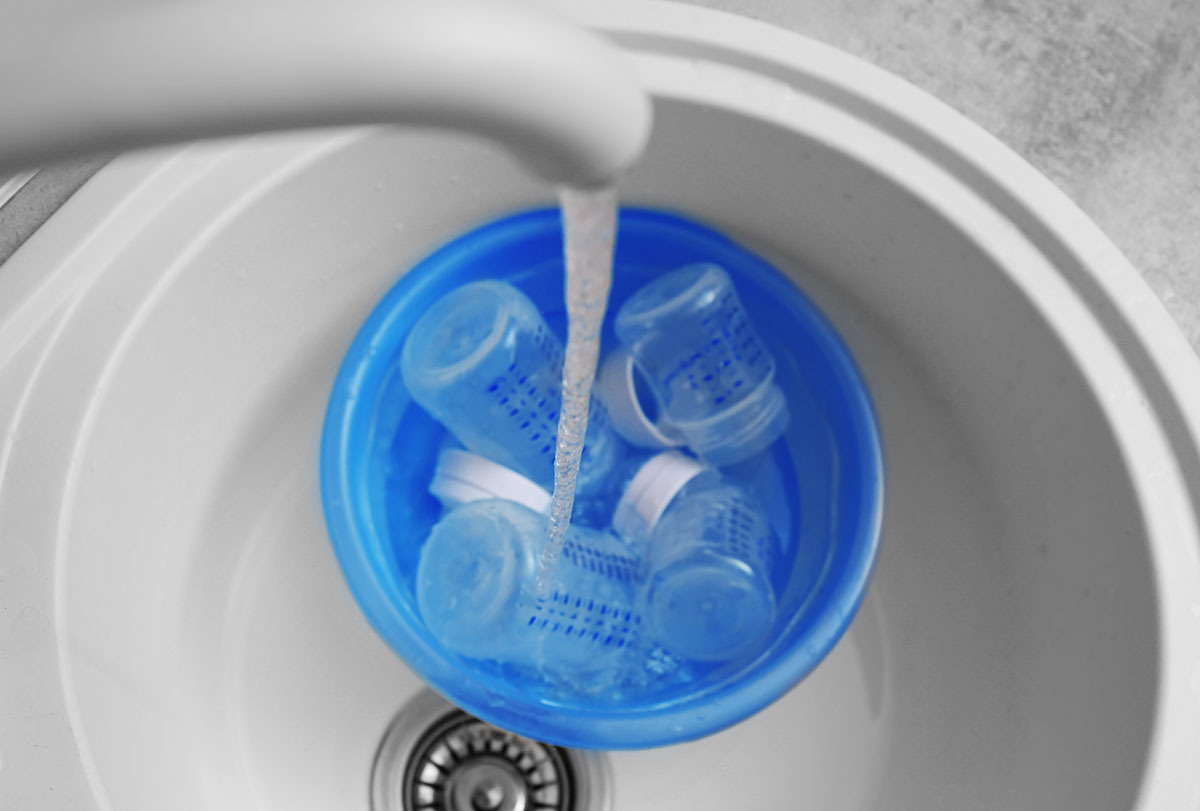
- Lastly, rinse all the cleaned equipment with fresh cold running water before setting it aside to air-dry.
This preliminary form of cleaning is important for removing all traces of milk or formula left inside the bottles, but it does not ensure that the feeding equipment is completely sterile or germ-free.
Note: Using salt to clean teats is strictly prohibited as it can be dangerous for your baby.
Standard Methods of Sterilizing Baby Bottles
There are a number of different methods to sterilize your baby’s bottles, teats, lids, and other feeding equipment. You can pick and choose from any of the tried-and-tested options given below, depending on what’s most convenient for you.
1. Sterilization by boiling
The mechanism behind sterilization through boiling water works by raising the temperature high enough to kill any bacteria left over after washing. (2) This is perhaps the simplest form of sterilization and does not require any special equipment. A basic kitchen pan or pot and clean water are all you need for this method to work.
However, before you proceed with this method, make sure that the feeding equipment that you want to sterilize is safe to boil.
How to do:
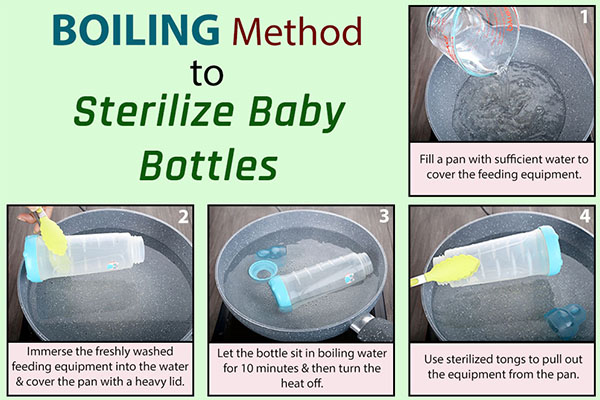
- Fill an adequately sized pot or pan with sufficient water to cover the feeding equipment that you intend to sterilize.
- Immerse the freshly washed feeding equipment in it such that there are no air traps.
- Cover the pan with a heavy plate or lid that almost touches the surface of the water.
- Place the pan on a stove burner set on high, and bring the water to a boil.
- Let the water boil for at least 10 minutes, and set a timer so you don’t forget to turn the heat off.
- If you plan to prepare the bottle right away, clean your hands and the kitchen surface beforehand. In fact, disinfecting your hands before handling any sterilized equipment is mandatory regardless.
- Use sterilized tongs to pull out the equipment from the pan. To that end, you may want to plunge the tongs into the water while it was boiling and leave them be for some time. Once the heat is turned off, allow the tongs to cool off a bit so that you don’t burn yourself trying to hold them.
- As soon as you take the equipment out, assemble the lids and teats on the bottles straightaway.
- Give the bottle a shake to get rid of the dripping water, if you need to use them right after sterilization.
- If there is no urgency, place the bottle on a dry, clean dishcloth in an upside-down position or on the upturned lid of the pan to get rid of the excess water and allow them to air-dry.
- Once dry, refrigerate the bottles with the teat on in a clean container to prevent contamination.
Note: Because the teats are usually too fragile to bear the boiling heat for a prolonged period, they are likely to crack or tear in this method. For this reason, it’s best to boil them for no more than 5 minutes. Even then, regularly check them for any sign of heat-induced damage.
2. Using the microwave
Microwave sterilization works on the principle of using steam power to sterilize baby bottles and teats. As microwaves that are in regular household use invite a lot of food spills, they are often hygienically unfit for conducting a sterilization process.
There are, however, specially designed sterilization units available in the market that also harness the power of steam. Such units enclose the bottles in a plastic casing, giving them a more thorough cleaning inside the microwave. (3)(2)
How to use:
- Whether you are using a microwave steam sterilizer or a standard kitchen microwave, make sure that all the feeding equipment is thoroughly cleaned before beginning the sterilization process.
- You will also want to make sure that the insides of your microwave are devoid of any food residue.
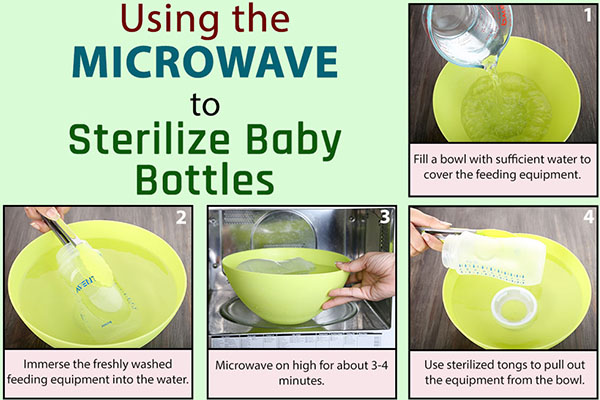
- When using a regular microwave, fill a bowl with water such that the feeding bottle, teats, rings, caps, and other accessories get submerged in it.
- Place the bowl in the microwave set on high for about 3–4 minutes.
- Use clean, dry oven mitts to remove the equipment from the microwave. Dump the remaining water, and let the equipment air-dry on a sanitary surface. Alternatively, you can also wait for the feeding items to return to normal temperature so that you can handle them with your bare but clean hands.
3. Using bleach
Bleach offers another nifty way to sterilize your baby’s bottle when you’re in a crunch situation, without any access to the basic amenities required for standard sterilization such as boiling water, steam, or a dishwasher. This easy-to-do method involves the following steps: (4)
How to use:
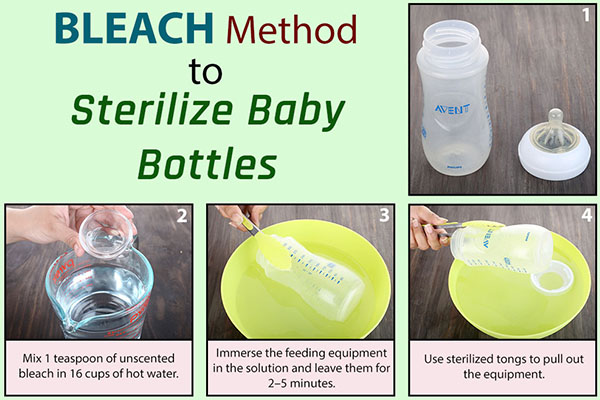
- Mix 1 teaspoon of unscented bleach in 16 cups of hot water.
- Immerse the feeding equipment in the solution in such a way that there isn’t any air bubble formation at the bottom of the bottle.
- Soak the bottle for 2–5 minutes, and then pull them out of the solution using sterilized tongs.
- Place the damp bottles on a clean dish towel and allow them to air dry.
- As any remaining traces of bleach will naturally break down during the drying process, there’s no need for a follow-up rinse once the bottle is taken out of the solution.
Note: Bleach should be used with caution; ventilation should be adequate and consistent with relevant occupational health and safety guidance. Improper use of bleach, including deviation from recommended dilutions (either stronger or weaker), may reduce its effectiveness for disinfection and can injure healthcare workers.
4. Try cold sterilization
Parents who are always on the move and rely on a baby bottle sterilizer may find themselves without access to electricity or boiling water while being out and about. Cold sterilization is perfect in such situations. (2)(1)
How to do:
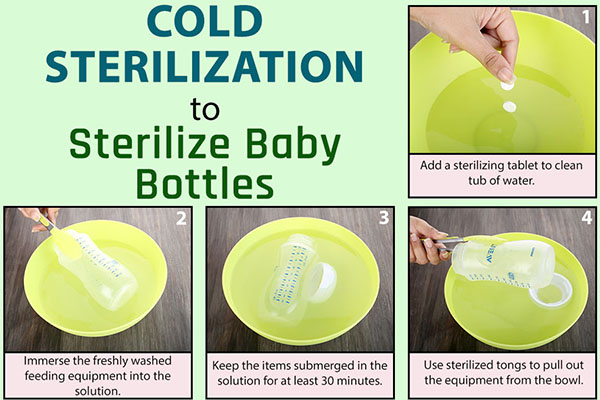
- Add a sterilizing solution or tablet (available from supermarkets) to a clean plastic bucket or tub of water, and then plunge the baby items in it.
- Keep the items submerged underwater for at least 30 minutes or preferably longer.
- The same water and solution can be safely reused as needed but should be changed after 24 hours.
5. Avail an electric sterilizer
An electric sterilizer is one of the most convenient tools for sterilizing your baby’s bottle. This device gets the job done in no time and with minimum effort. High-temperature steam is used to kill the microorganisms in the bottles and teats. (3)
How to use:
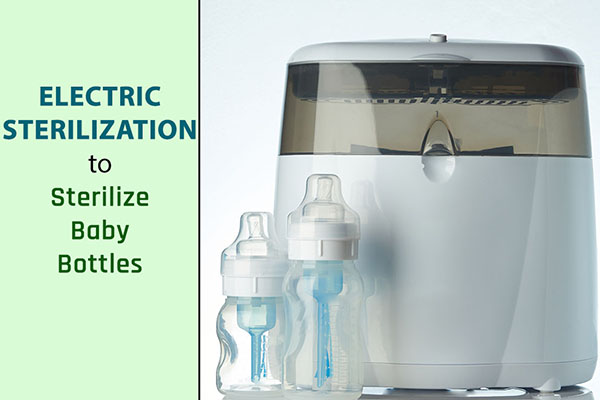
- Simply place the cleaned baby bottles and teats into the sterilizing unit. Make sure the mouth of the bottle and teats are facing downward to allow efficient sterilization. Pour clean filtered water as instructed in the user manual.
- Switch on the device. Switch it off once the sterilization is complete.
- Go through the user manual to check for instructions regarding how long the bottles can be kept inside.
Electric sterilizers are far more efficient than boiling or microwave methods as they obliterate the chances of any human fallacy.
Additional Method to Sterilize Baby Bottles
Using UV light
UV light can kill most microorganisms ranging from bacteria and viruses to mold populations. Working on this principle, UV light sterilizers can help you sterilize the teat of your baby’s feeding bottle.
Although this method cannot sterilize your child’s feeding bottle, it is a small, lightweight portable instrument that can help you out while traveling.
Reasons to Sterilize Baby Bottles
Be it a glass, plastic, or silicone bottle, cleaning and sterilizing this feeding equipment is essential for the following reasons:
- It is very easy for pathogenic microorganisms to accumulate and thrive within the damp insides of the bottle. Bottles that have had milk stored in them and are not cleaned properly thereafter offer perfect breeding grounds for disease-causing bacteria and viruses. Subsequently, these microorganisms can gain easy access into your baby’s body, which can lead to bouts of vomiting, diarrhea, and other infections and illnesses. (5)
- A newborn possesses only those disease-fighting antibodies that have been passed on from the mother during the last three months of pregnancy. This form of passive immunity begins to wane in the first few months after birth.
- The water supply at your home may be contaminated with disease-causing microbes or other impurities, especially if you do not use municipal treated water.
When to Sterilize Baby Bottles
It is a common misconception that brand-new, unused baby bottles are devoid of any germs and are safe to use without being cleaned first. However, you can never be too sure about where the bottle has been and how it was handled before it was packaged and sold to you.
Besides, a lot of chemicals go into the manufacturing of these bottles, and they are exposed to a lot of possibly germ-ridden hands in the factory, during shipping, and in stores, before they reach you. It is highly likely that even if a bottle has never been used, it might still have a lot of toxic and infectious agents latched onto its surface.
Thus, when you buy a fresh new bottle, it is recommended to sterilize it after rinsing it with hot, soapy water, either by hand or in your dishwasher. This kind of thorough cleaning serves in the interest of your baby’s health and safety as it rids the bottle of any surface grime and germs. (6)
The initial sterilization effect will wear out after some time and the feeding supplies will eventually start picking up germs from your home.
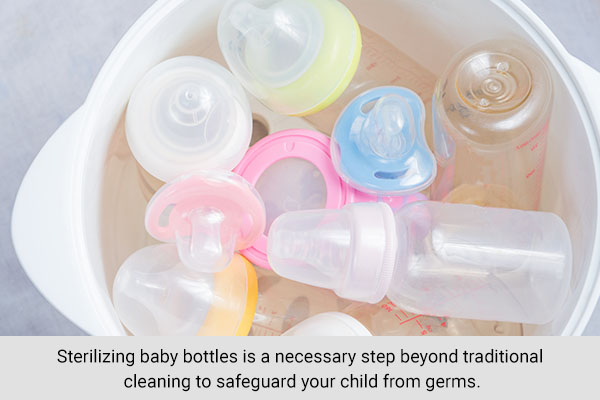
Sterilizing baby bottles is a necessary step beyond traditional cleaning to safeguard your child from germs. It aims at killing bacteria and other disease-carrying agents in the bottle through the use of chemicals and high temperature.
There was a time when the need for sterilizing your baby’s bottle was far more pressing than it is today. With the steady improvement in water quality, particularly in the developed world, most homes are now supplied with relatively safe and reliable water sources. As a result, the need for sterilizing bottles beyond the first use seems redundant except in certain cases, such as:
- If you’re using an old bottle that has been borrowed from someone else or is a hand-me-down from an older sibling of the baby, sterilization is mandatory to dispel any pathogenic traces.
- If your baby was recently sick, chances are some of the disease-causing bacteria might have stuck on the bottle, and using it without sterilizing might end up reinfecting the baby.
- If your baby had a premature birth, is less than 3 months old, or has compromised immunity due to health issues such as HIV or ongoing medical treatment such as chemotherapy, daily sterilization is all the more important to ensure his/her health and well-being. (4)
- If you don’t have access to good-quality municipal drinking water that isn’t coming from a well or you’re traveling to a country with unreliable water sources, you may need to sterilize your baby’s bottles every so often to avoid the buildup of harmful microbes.
Frequency of Sterilizing Baby Bottles
While most experts agree upon the importance of sterilization, there are varying opinions regarding how many times it should be done.
If your baby is otherwise healthy and you wish to keep it that way, washing the bottles in a dishwasher with a heat cycle or scrubbing them by hand in hot, soapy water as soon as your baby is done feeding should suffice to keep the germs away.
Once your baby crosses 3 months of age, you can do without the daily sterilization given that the feeding items are carefully cleaned after every use. If, however, the bottle is left uncleaned for a few hours after your baby last used it, that’s all the time it takes for bacteria and viruses to fester. In such instances, most child experts recommend subjecting your child’s feeding items to a second round of sterilization.
Some experts incline towards a more cautious approach that calls for regular sterilization, once every week. Given that sterilizing your baby’s feeding equipment is a pretty straightforward process that can be easily managed within half an hour, it’s not a big ask when we consider what’s at stake.
Just the peace of mind in knowing that you are doing the best you can to keep your little one out of harm’s way is well worth the effort.
Safety Tips
- Always be alert when using hot or boiling liquids, especially if there are children in the house. Never leave them unattended or within reach of children to stave off burning accidents or injuries.
- Be mindful when using steam for sterilization as it can burn or scald you just as badly as boiling water.
- Store chemicals and chemical solutions in places that are beyond the reach of children.
- If you do not wash your hands thoroughly before handling equipment that has been sterilized, you risk transferring any lingering germs from your hand to the freshly sterilized bottle. This single lapse can undo all your concerted efforts and must be avoided.
Final Word
Babies have to be shielded from the all-pervasive disease-carrying agents that riddle the environment, particularly in the initial few months after birth.
Keeping your baby’s bottle and its accessories squeaky clean is one such way to ensure the health and well-being of your tiny, vulnerable being.
- Was this article helpful?
- YES, THANKS!NOT REALLY


